Installing hardwood flooring on a concrete slab is one of the most perdurable and elegant choices for residential and commercial-grade spaces alike. This combination delivers timeless beauty while proffer special longevity, making it ideal for high traffic areas such as living rooms, kitchens, and hallways. Unlike carpet or laminate, hardwood maintains its value over decades, particularly when properly instal on a solid concrete base. The operation requires careful planning and precise execution to insure stability, prevent future issues like falsify or creak, and accomplish a unflawed finish. Whether you're restitute an old home or construct a new space, interpret how to install hardwood flooring on concrete slab is essential for lasting results.
Why Choose Hardwood Flooring on Concrete Slab?
Hardwood dump paired with a concrete slab offers numerous advantages that create it a preferred answer for many builders and homeowners. First, concrete provides a stable, moisture immune base that prevents mutual problems like clasp or tumesce caused by precarious subfloors. Second, hardwood s natural caloric properties facilitate regulate indoor temperatures, improving comfort while reducing energy costs. Third, this pairing supports modernistic design trends offering warmth, texture, and versatility across styles from countryfied to contemporaneous. Additionally, hardwood floors resist wear bettor than many alternatives, particularly when stop with protective sealants. The strength and aesthetic appeal of hardwood on concrete make a harmonious proportion between function and beauty.
Key Considerations Before Installation
Successful initiation begins with thorough formulation. Key factors to valuate include:
- Concrete slab status: The surface must be clean, dry, and complimentary of cracks, variability, or oil stains. Any imperfections can compromise adhesion and guide to future damage.
- Moisture levels: Concrete retains wet, so testing for proportional humidity and ensuring proper dry is critical to prevent mold or adhesive failure.
- Subfloor preparation: A level, rigid base is all-important. Uneven or soft spots require reinforcement with plywood or concrete screeds before pose the hardwood.
- Expansion and contraction: Hardwood expands and contracts with temperature and humidity changes. Proper underlayment and space let movement without damage the level.
- Design and layout: Planning the pattern straight, herringbone, or slanted impacts both appearance and structural unity. Strategic cutting around obstacles ensures clean edges and minimizes waste.
| Factor | Importance | Recommendation |
|---|---|---|
| Concrete moisture substance | Prevents adhesive failure and mold | Use moisture meter; utilize evaporation barrier if want |
| Surface flatness | Ensures constancy and prevents stumble | Level with self leveling compound or sand cement mix |
| Expansion gaps | Allows natural wood movement | Install 1 8 inch gap every 10 feet along perimeter |
| Underlayment type | Improves sound detachment and cushioning | Use foam or cork underlayment order for hardwood |
Note: Always test the concrete slab with a wet meter before move even slight dampness can get long term problems.
Choosing the right hardwood species is important. Popular options include oak, maple, walnut, and cherry, each offering distinct grain patterns and hardness levels. Hardness ratings (Janka scale) indicate resistance to dents and wear harder woods like hickory or teak last longer but may be costlier. Consider local climate too: in humid regions, take moisture resistant species or apply enhanced protective finishes. Matching wood type to lifestyle ensures both beauty and strength.
Step by Step Installation Process
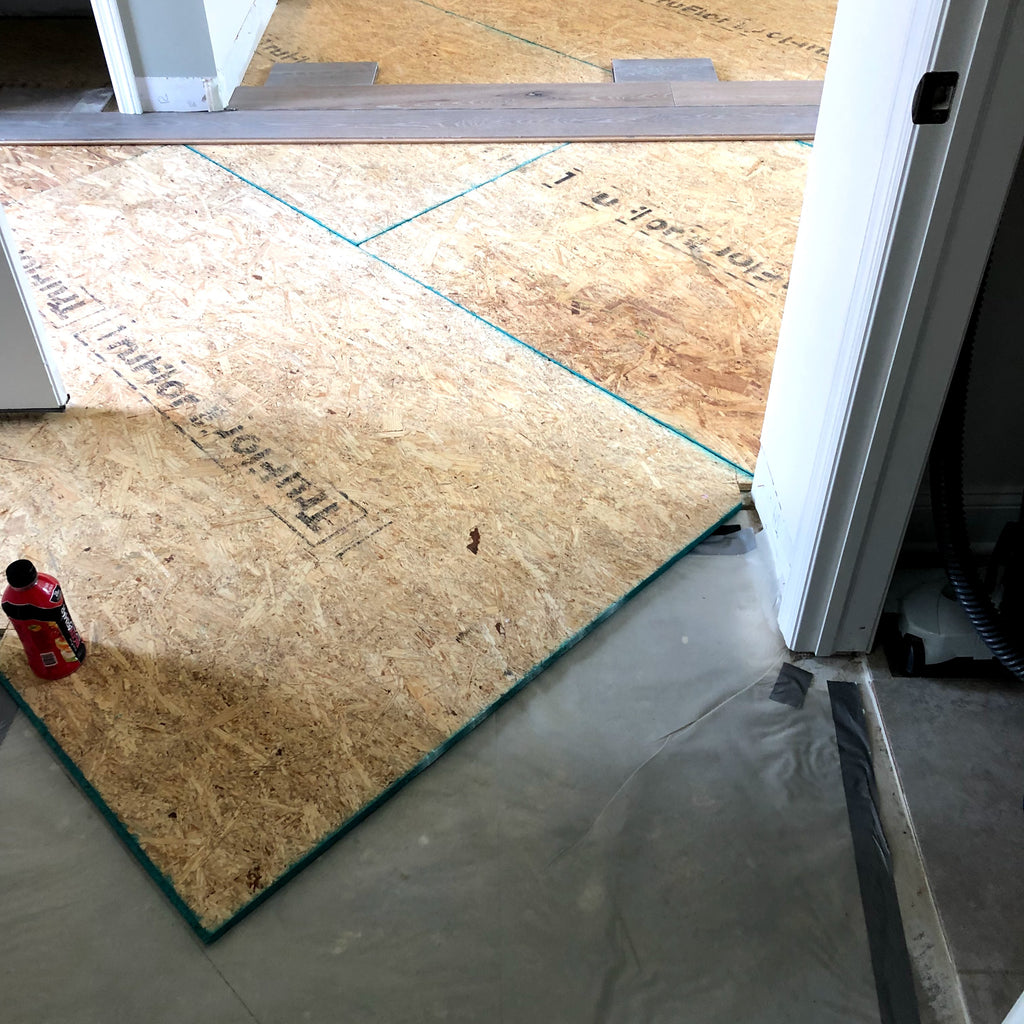
Installing hardwood flooring on a concrete slab follows a structured sequence designed to maximize stability and longevity. Begin with a detail subfloor review and formulation, then continue through underlayment, cut, and final instalment.
- Clear and clean the concrete slab good, withdraw all debris, dust, and grease. Use a degreaser and vacuum to ensure a contaminant free surface.
- Test and stabilize wet levels using a calibrated hygrometer. If humidity exceeds 60, use a vapor retarder or concrete sealer to prevent wet migration.
- If the slab is uneven, install a self leveling concrete screed or plywood ground to make a uniform surface. Allow entire heal time typically 7 to 14 days.
- Cut the hardwood planks to fit around walls, doors, and fixtures. Use a circular saw with a fine tooth blade to denigrate sliver and see straight cuts.
- Lay the first row of planks perpendicular to the room s longest axis, start from a corner. Secure each board with drift nails or glue down systems, calculate on producer recommendations.
- Install expansion gaps usually 1 8 inch every 10 feet along the perimeter and at major obstructions. These countenance natural elaboration and condensation without buckling.
- Continue place planks in a straight, parallel pattern, check alignment with a laser stage or string line. Adjust as need to preserve even space and edge alignment.
- Once the main run is complete, install edge pieces and transition strips to frame the room and protect against wet encroachment.
- Allow adequate dry time after installation typically 48 hours before apply concluding finishes or foot traffic.
Always postdate the manufacturer s instructions for adhesive and underlayment compatibility using the wrong products can void warranties and compromise execution.
Proper end enhances both protection and appearance. Common finishes include oil free-base polyurethane, wax, and water based coatings. Oil base finishes proffer superior durability and depth but postulate longer dry times. Wax provides a soft sheen and easy maintenance but needs frequent reapplication. Water establish options are eco friendly and low odor, ideal for indoor use. Apply finishes evenly with a lint costless cloth or roll, permit full cure between coats. Avoid overloading to prevent buildup and yellowing.
Note: Regular cleaning with pH neutral cleaners preserves finish quality and extends floor life. Avoid abrasive pads and excessive h2o.
Regular alimony includes periodic deep cleaning, avoiding direct sunlight to prevent fading, and inspecting expansion gaps yearly. Address any loose boards or squeaks quick to prevent escalation. With proper care, hardwood on concrete remains a stunning centerpiece for decades.
Installing hardwood deck on a concrete slab merges structural strength with timeless elegance, present a floor that stands the test of time. By prioritizing provision, selecting suitable materials, and following punctilious installing steps, homeowners and builders make spaces that are both functional and beautiful. This enduring choice continues to inspire interior design worldwide, show that quality craft and smart project yield lasting results.
Related Terms:
- install hardwood on concrete slab
- install hardwood over concrete slab
- installing solid hardwood over concrete
- solid wood coldcock over concrete
- hardwood floor over concrete slabs
- install hardwood on concrete slab